Hey there! I am absolutely thrilled to share some exciting updates with you. I’ve been working tirelessly behind the scenes on this blog. I couldn’t be more delighted to announce the addition of brand-new galleries and store items! Come see the 2023 MotoAmerica Superbike Championship Gallery and Photo Collection!
This year, I had the incredible opportunity to attend the 2023 MotoAmerica Superbike Championship for the first time! Let me tell you, it was a truly unforgettable experience. The roaring sound of the engines, the adrenaline-filled atmosphere, and the sheer speed of the superbikes and “baggers” left me in awe. I was captivated by the passion and skill displayed by the riders, and I knew I had to capture these breathtaking moments to share with you all.
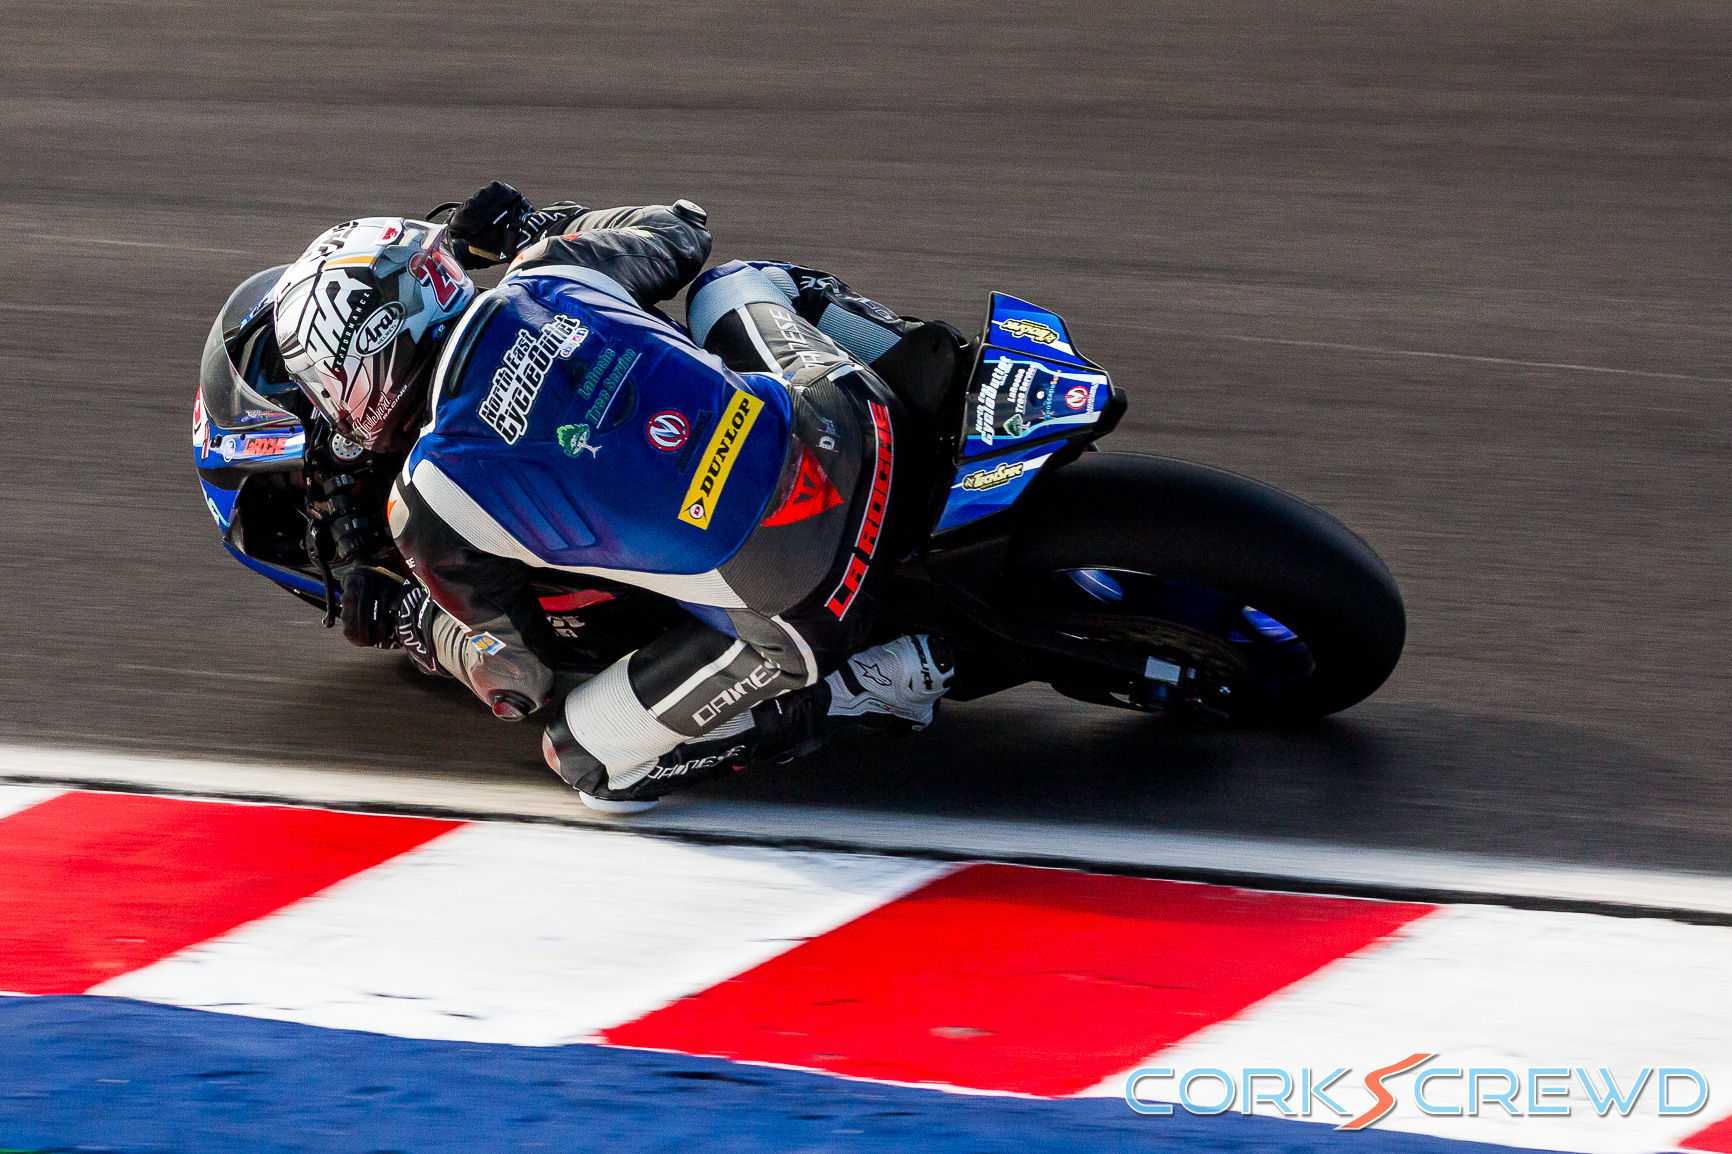
That’s why I’ve curated a captivating collection featuring the most exhilarating moments and breathtaking captures from this year’s championship. Each photograph tells a story of dedication, precision, and pure adrenaline. You’ll feel as if you’re right there on the track, witnessing the heart-stopping races and triumphant podium celebrations. It’s an immersive visual journey that will transport you into the center of the action!
But that’s not all! In addition to the new gallery items, I’m offering special, full-sized downloads of select photos from the 2023 MotoAmerica Superbike Championship for just $5 each! You can own a piece of racing history captured through my lens at an affordable price. It’s an opportunity you won’t want to miss! Come check out the new collection right now!
I’ll be adding more galleries and store items very soon, so stay tuned!
When I embarked on my photographic journey in 2017, I was clueless about using my camera. Shooting seemed like an intricate dance of trial and error. My early photos were plagued by blurriness, out-of-focus subjects, and missed frames. But through relentless research, countless hours of reading, and dedicated practice, I’ve reached a level of confidence where I can now effortlessly capture the shots I desire at any race. If you’re itching to dive into race photography (or any other sport, for that matter), then join me as I share my guide on How to Shoot a Race!
Planning Ahead
Before venturing to a race, meticulous planning and strategizing are paramount. Dive deep into understanding the racecourse, identifying those pivotal spots that offer dynamic photo opportunities. Take note of lighting conditions, potential obstacles, and accessible points to ensure you’re thoroughly prepared.
For instance, at WeatherTech Raceway Laguna Seca, I prefer waiting until late morning or early afternoon to shoot at the Corkscrew. This allows me to avoid the foggy conditions that dull the colors and lighting. Moreover, with the sun’s rays angling towards the Corkscrew for most of the day, the cars are beautifully illuminated from the front when shooting from inside the track. However, if you’re seeking more dramatic photos, try shooting against the light at Turn 5 during the late morning and afternoon. The resulting backlit shots will leave you awestruck! Just remember to exercise caution and avoid shooting directly into the sun.
Knowing when and where to shoot is a skill you must master. It’s not rocket science (well, mostly), and you can employ tools like SunCalc to conveniently plan your lighting conditions. Yet, part of learning how to shoot a race is discovering the spots where the real action unfolds. Some of my most breathtaking shots were captured where racers were compelled to slow down and navigate tight turns. At Laguna Seca, Turns 2, 3, 5, the Corkscrew, and Turn 11 present phenomenal opportunities to seize action-packed shots. In fact, it was at Turn 11 that I captured one of my all-time best photographs! Learning the art of shooting races entails being in the right place at the right time. With practice, you’ll soon be freezing remarkable moments through your lens.
The adage “the gear doesn’t make the photographer” still holds true, but having the right equipment is vital for capturing high-quality race photographs. A DSLR camera with a fast burst rate and excellent autofocus is highly recommended. Opt for a versatile telephoto lens that allows zooming in on the action while maintaining clarity. Don’t forget spare batteries and memory cards to capture critical moments without interruption.
This Canon EOS 5D MkII with the EF 28-135mm F3.5-5.6 USM lens is the perfect starter kit for shooting races!
Fast memory cards are a must. I use a Sandisk 64GB Extreme Pro SD Card with a read/write speed of 200Mb/s to avoid buffer issues when shooting in continuous mode. It’s great for short bursts in RAW format and even better for JPEG shots.
The best part is that you don’t need to break the bank. Older DSLRs work just fine, and there are affordable options on the used market. Check out B&H Photo, Amazon, eBay, Craigslist, and swap meets for cameras, lenses, and accessories.
Also, you should carry only the essentials. Opt for a small camera bag or backpack. It’s lightweight and perfect for getting interesting shots while hiking around the track. Your back will thank you!
Lastly, remember to carry sunscreen, water, ear protection, and cleaning tools. Always have a microfiber cloth and duster to keep your lens dust-free. Wear a hoody, sunhat, sunglasses, and ear protection for added comfort and safety. I can’t tell you how many times the incredible-sounding Mazda 787B nearly made me deaf as it flew by!
The tinnitus starts up again whenever I look at this image!
Now, get ready to capture breathtaking moments. With the right gear, the race is on, and endless possibilities await. Embrace the adrenaline and let your lens do the talking.
Let me tell you, the combination of Continuous Autofocus (AI-Servo or AF-C) and Continuous Shutter (or Burst Mode) is an absolute game-changer when it comes to capturing the heart-pounding action of a race! I can’t emphasize enough how powerful this duo is. With my Canon DSLR’s autofocus mode set to AI-Servo, all it takes is a half-press of my shutter button to lock onto a specific point on the race car I’m aiming to shoot. It’s like magic! Once I’ve set my focus, I can keep that car razor-sharp even as it zooms by at breakneck speeds. Now, pair that with Continuous Shooting mode, and you’ve got yourself a recipe for capturing that perfect shot or a jaw-dropping series of shots! It’s pure photography bliss!
But let me give you a word of caution— that shutter button can be a bit of a double-edged sword. Once you start clicking away, time seems to fly by, and before you know it, you’ve amassed thousands of photos! Believe me, it’s incredibly easy to get caught up in the adrenaline rush of the race and end up with a memory card bursting at the seams. So, while this combination is an absolute dream, be mindful of your trigger finger and keep it in check. Quality over quantity, my friend!
So, buckle up and embrace the magic of Continuous Autofocus and Burst Mode. It’s the ultimate ticket to freezing those exhilarating moments and immortalizing the thrill of the race! Get ready to capture shots that will make hearts race and jaws drop!
Timing and Anticipation
Timing is everything when learning how to shoot a race! Anticipate the decisive moments by observing the racers and their patterns. Be ready to press the shutter at the peak of the action, whether it’s a thrilling overtaking maneuver or a celebratory victory moment. Patience and attentiveness will greatly improve your chances of capturing captivating images.
I often only shoot the very beginning stages of a race, or the end, since that’s when most of the action will happen. For example, I’ll wait at the exit of Turn 2 at Laguna Seca at the beginning of a race, since everyone will be jockeying for position into the turn and out of it! Sometimes you can get some off-roading action there! Other times, I’ll wait at some sharp corners near the end of the race, since that’s where some racers would go a little too fast and end up in the gravel traps! That’s how I got those awesome photos of the Panoz LMP-1 Roadster-S scrambling to get back on the track after overshooting Turn 11!
Other times, I sit back and watch the race without even using my camera until I notice something interesting. A few years back, I saw one of the Kremer-Porsche K3 race cars spitting massive flames before it plunged down the Corkscrew. I hurried to a vantage point where I can fully see where the flames would appear, and just shot as many photos as I could. That’s how I ended up with my favorite photo series of all time!
Learning how to shoot a race is an exercise in patience, timing, and anticipation. Once you learn how to be at the right place and at the right time, your photos will be incredible!
Now here is where the real work begins: Post Processing! This is where you will spend most of your time if you want your photographs to stand out. But the first thing you should consider is whether or not you will be shooting in RAW, or JPEG format.
RAW format is basically this: a digital negative where you can edit the look of a photo, but without losing the original photo. Basically, when editing a RAW photo, you’re actually editing a copied instance of the photo. RAW format is perfect for making multiple edited copies and tweaking as many settings as you can to get the look you want. However, RAW format takes up a lot of space and memory. You can actually hit the image buffer on your camera much more quickly, making you miss that shot!
JPEG format is a lossy format that has much less editing capabilities than RAW, but also takes up less space! It’s easier to handle for beginner photographers, but professionals will lament the limited editing capabilities. With a faster memory card, you’ll be less likely to hit the image buffer of your camera too. Did I mention JPEG is the most common image format on the web? With JPEG, you won’t run into problems publishing your photos on Instagram, WordPress, or other platforms!
Editing your photos often boils down to what programs you can use. For my own photos, I use Adobe Lightroom. Its editing, cataloging, and export capabilities allow me to quickly collect, edit, and publish photos! But, if you’re just starting out, you can use free programs like Darktable. Darktable has a lot of the same capabilities that Lightroom has; like the ability to read RAW format. It’s also open-source, which means it’s completely free to use! While both Lightroom and Darktable seem very complicated, there are a lot of tutorial videos on YouTube that can teach you the basics and allow you to quickly learn how to edit your photos from the races!
Final Thoughts
Learning how to shoot a race with a DSLR camera presents an exhilarating opportunity to capture the speed, passion, and intensity of these exciting events. By planning ahead, selecting the right gear, mastering the essential techniques, and using your creativity, you can produce stunning photographs that not only document the race but also convey the emotions experienced by both the racers and the spectators. So grab your DSLR, head to the next race, and let your lens tell the captivating story of the race like never before!
By now, I’ve already made my love for vintage lenses very known on this blog! In my last post, I found and reviewed the Yashica Yashinon DS 50mm F1.9. That review actually led my stepfather to express interest in adapting vintage lenses to his own mirrorless camera! So, I decided to give him that lens and start looking for a replacement. While browsing at a local swap meet, I find an ancient-looking camera and an interesting lens attached. It was the Mamiya Sekor 55mm F1.4. Intrigued, I decided to buy the camera and its lens and give it a try. Little did I know, this was going to wind up being one of my favorite lenses!
Join me on an exciting adventure as we explore the captivating world of the Mamiya Sekor 55mm F1.4 prime lens. From its rich history to remarkable optical performance and unique thorium anti-glare coating, this lens has truly left a lasting impression on me. Let’s dive into the story behind this lens, the cameras it fits on, and my personal experience with its exceptional image quality, performance, mechanical feel, and affordability.
The History of the Mamiya Sekor 55mm F1.4 Prime Lens:
Back in the early 1970s, the renowned Japanese camera manufacturer, Mamiya, introduced the Mamiya Sekor 55mm F1.4 prime lens. The 55mm F1.4 lens quickly gained popularity for its versatility and outstanding optics. This combination of versatility and quality made it a favorite among professionals and enthusiasts alike. One very interesting aspect of this lens is its use of Thorium as an anti-glare coating. Thorium is a radioactive element, therefore, this lens is actually slightly radioactive! As the Thorium ages, it actually yellows, giving photos a slightly warmer tint. No danger of radiation poisoning though: This lens will barely ping a Geiger counter!
The Mamiya Sekor 55mm F1.4 and the camera it came with; the Mamiya Sekor 1000DTL. Photo credit goes to The Casual Photophile.
Camera Compatibility:
Initially designed for the Mamiya/Sekor 1000 DTL series, this lens proved to be a perfect match for these cameras. The advanced features and build quality of the Mamiya/Sekor 1000 DTL series complimented the exceptional capabilities of the 55mm F1.4 lens. This lens allowed photographers to unleash their creativity and capture stunning images.
In addition to the Mamiya/Sekor 1000 DTL series, I was delighted to discover that the Mamiya Sekor 55mm F1.4 lens is also compatible with other M42 screw-mount cameras. This versatility allows me to experience the lens’s exceptional optics on a wider range of camera bodies. I ended up buying a simple M42 adapter for my Canon DSLR camera to fully test the capabilities of this lens.
Impressive Image Quality:
The moment I first attached the Mamiya Sekor 55mm F1.4 prime lens to my camera, I was blown away by its outstanding image quality. The lens delivers impeccable sharpness, stunning contrast, and vibrant colors, allowing me to capture every detail with precision. Whether I’m shooting portraits, exploring the streets, or immersing myself in low-light environments, this lens never fails to impress me. For reference, the following gallery was shot at around F1.4 – F2 in Aperture Priority mode, in differing lighting conditions. None of these photos were edited either!:
The wide maximum aperture of F1.4 is a game-changer, enabling me to achieve a beautiful shallow depth of field and exquisite subject separation. The bokeh produced by this lens is simply breathtaking, rendering out-of-focus areas with a smooth and creamy quality that adds a touch of magic to my photographs. It creates a three-dimensional feel, enhancing the visual impact and drawing viewers into the scene. The bokeh effect even has swirl! In addition to this, the lens is still fairly sharp fully open. At F2, the image becomes even sharper but still retains that incredible depth of field.
Unmatched Performance and Mechanical Feel:
Using the Mamiya Sekor 55mm F1.4 lens is a joy in itself. The lens feels robust and well-built, instilling confidence in its durability. The smooth focus ring allows for precise manual focusing, giving me full control over my compositions. I appreciate the tactile feedback and the satisfying mechanical feel of the lens, which adds to the overall shooting experience. The aperture dial also features half-stops, allowing greater flexibility in different scenarios. In comparison, my Nikon Nikkor-S.C. Auto 50mm F1.4 does not feature half stops!
Furthermore, the lens performs exceptionally well in low-light conditions. Its wide maximum aperture not only facilitates creative depth of field control but also ensures I can capture stunning images even in challenging lighting situations. The lens’s ability to excel in low light expands my photographic horizons and allows me to capture moments that would have otherwise been missed.
An example of a Mamiya Sekor 55mm F1.4 on Ebay. While prices could be high online, you could find these at swap meets for less money!
Affordability and Rarity:
One intriguing aspect of the Mamiya Sekor 55mm F1.4 prime lens is its rarity in today’s market. As a result, prices for this lens online tend to average over $100. This is a reflection of its desirability among photographers seeking its exceptional optics and vintage charm. However, there is still hope for those looking to add this gem to their collection without breaking the bank.
While the Mamiya Sekor 55mm F1.4 lens may be rare and command higher prices online, luck may shine upon you in unexpected places. Just like I did, you might stumble upon this lens at a local swap meet or thrift store, presenting a golden opportunity to acquire it at a fraction of its market value.
Sharing my personal experience, I was fortunate enough to find the Mamiya Sekor 55mm F1.4 lens bundled with the Mamiya Sekor 1000DTL SLR camera at a thrift store. The combined cost? A mere $25! This unexpected find further highlights the hidden treasures that await in unconventional avenues, allowing photographers to obtain remarkable equipment at surprisingly affordable prices.
Conclusion:
The Mamiya Sekor 55mm F1.4 prime lens has made a lasting impression on me through its rich history, camera compatibility, exceptional image quality, remarkable performance, satisfying mechanical feel, and affordability. It has become an indispensable tool in my photographic journey, helping me capture stunning moments with clarity, artistry, and a touch of magic. Whether you’re a professional or an enthusiast, I highly recommend experiencing the brilliance of the Mamiya Sekor 55mm F1.4 lens for yourself. It’s a lens that truly lives up to its remarkable reputation.